Split toning is not a feature I use very frequently, but when I do, it is such a great help for making subtle yet important tweaks to my photos! The key word here is SUBTLE. You do not want to overdo your split toning or you’ll end up with some nasty looking photos reminiscent of an era of photography we don’t want to bring back. 😉 If you do it right though, you can achieve gorgeous skin tones even on your digital images shot in less than perfect lighting.
I use split toning for two reasons, and both reasons have to do with the fact that I’m a MAJOR perfectionist over my editing, specifically over my skin tones. Ha! I’m not trying to make anyone else into a perfectionist, but if you sometimes just can’t quite feel satisfied with your skin tones, this post is for you!
The first reason I use split toning is to match my film scans. I’m not going to cover this today, because it’s a pretty tricky process to get exact, and I also firmly believe that you do not need to get your film and digital matched exactly – despite the fact that my perfectionistic nature often tells me otherwise. You need to get them close (which I do with my Mastin Labs presets), but I do not typically add split toning to those presets – only on occasion when I feel the need. 95% of the time, I get my film + digital images matched closely enough that I can’t remember which ones are which once I have them exported, even without adding any sort of split toning.
The second reason I use split toning is to make the skin tones in my digital photos prettier. Film rocks at creating gorgeous skin tones, while digital needs a little help sometimes. Usually, applying a Mastin Labs preset will do everything I need for my skin tones, but there are certain circumstances where I still feel the need for some adjustments – usually when I’m photographing subjects on grass or with a very yellowy, warm background (sunshine through yellowed leaves) or in deep shade with green surroundings. These sorts of settings mean that warming up your photo to help with your skin tones can leave you with a very yellow photo overall, and one that just doesn’t look as good as it could. Though I don’t use split toning all that frequently, each of the photos in this post is edited with split toning!
Before I walk you through, I just have to put this out there: these are my opinions, and this is my favorite way of quickly fixing some less than stellar skin tones. I shoot film, and I also shoot digital to emulate film. This is the style I personally love shooting, and so all of this revolves around achieving that specific look. If you love really warm images, go for it. If you find a different way of fixing your skin tones that’s different than this, go for it. If you’re in love with a totally different style, go all in! The good thing about photography is that there is room for all sorts of different opinions, styles, and methods! I hope this is helpful, but if it’s not, you do you. 😉
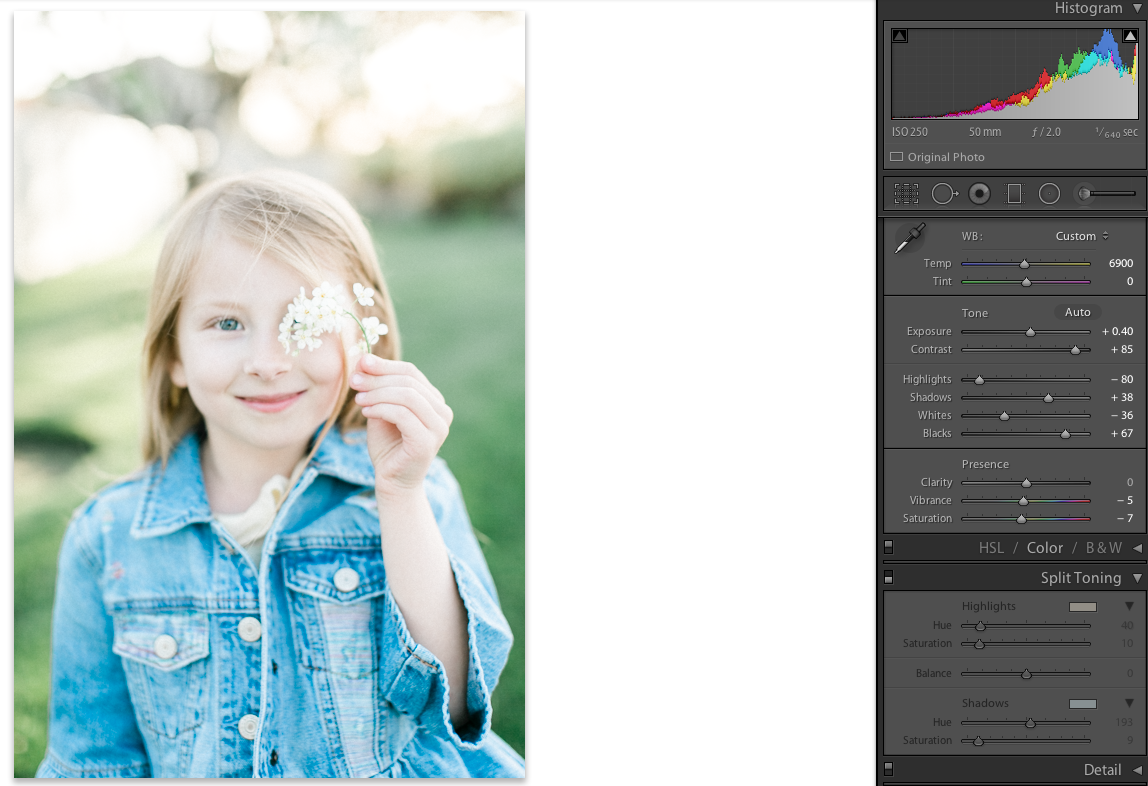
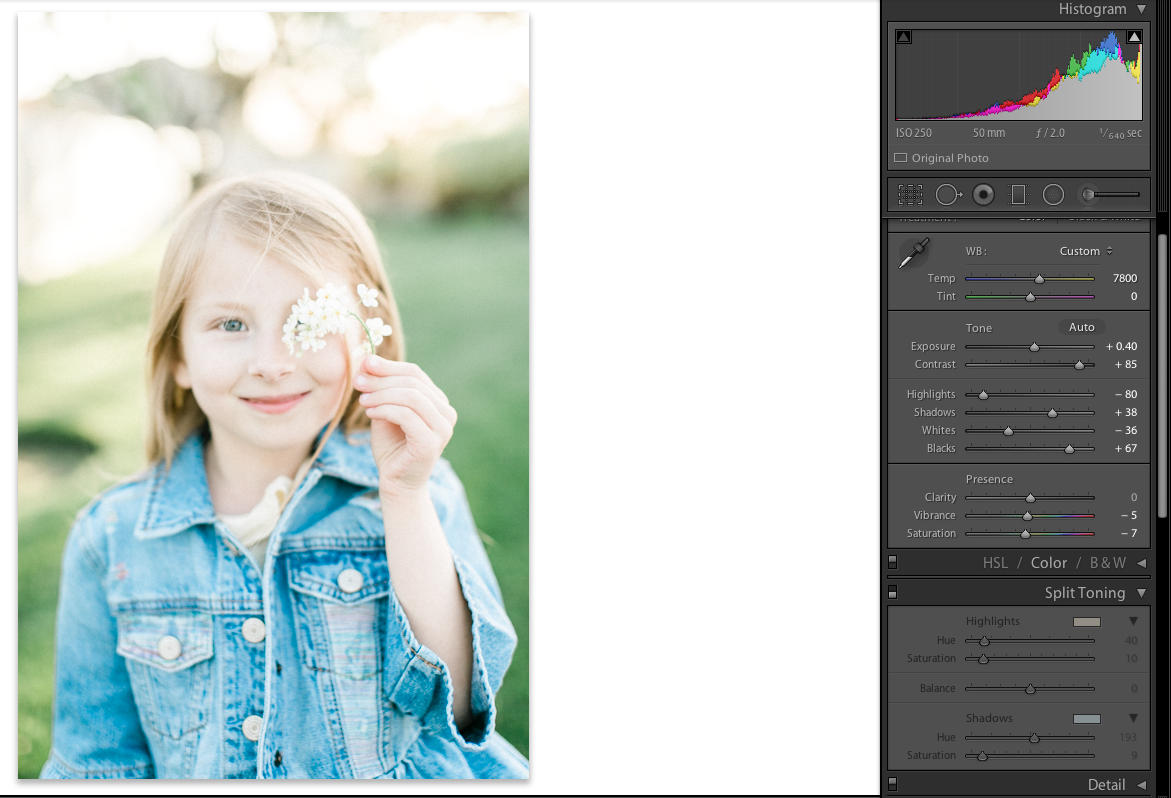
Alright, so let me actually SHOW you what I’m talking about and not just tell you. I took this photo of my daughter this past spring, near sunset, standing in some very dark shade on very green grass. The photo is totally fine, and is probably good enough as is, but I’m not loving how her skin doesn’t glow more. You can see some of my settings (I always edit using Lightroom), and you can see that split toning is OFF in this photo.
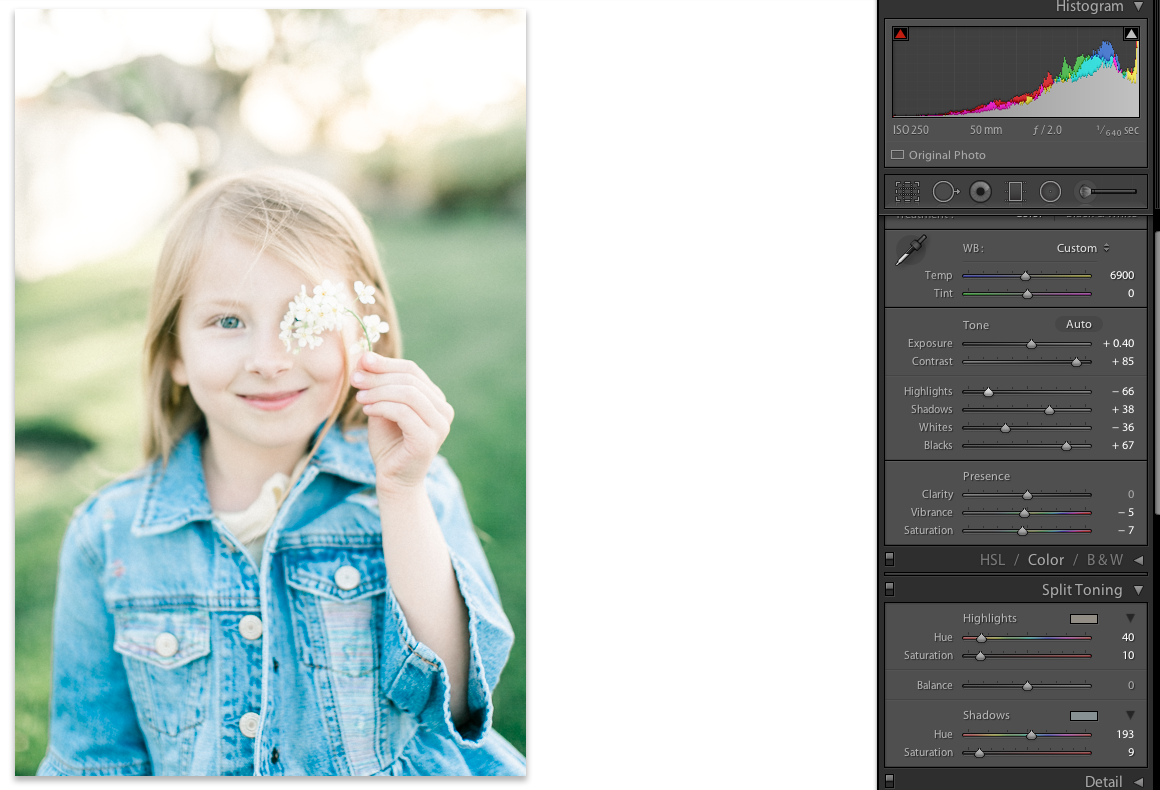
If I warm the image up to make her skin tone prettier, it feels too warm for my preferences. Again, it’s fine, but I don’t love how yellow the grass and background look, as my overall style is on the cooler side. In the image below, you can see that I warmed the image up quite a bit but split toning is still disabled.
So, what I do to find that balance of cooler greens and shadows, but warm, pretty highlights and skin tones, is add in just a little bit of split toning. In the image below, you can see that I cooled down my white balance again, enabled the split toning with the shades and saturations that I felt looked best, and I also upped the highlights and whites a little bit because split toning can sometimes make them look a little more muted, in my opinion.
This image, to me, is perfect. I love that the grass isn’t all yellow, but her skin glows warmly. Also note that it has the same white balance as the very first photo where her skin felt too cool.
Okay – a little cool.
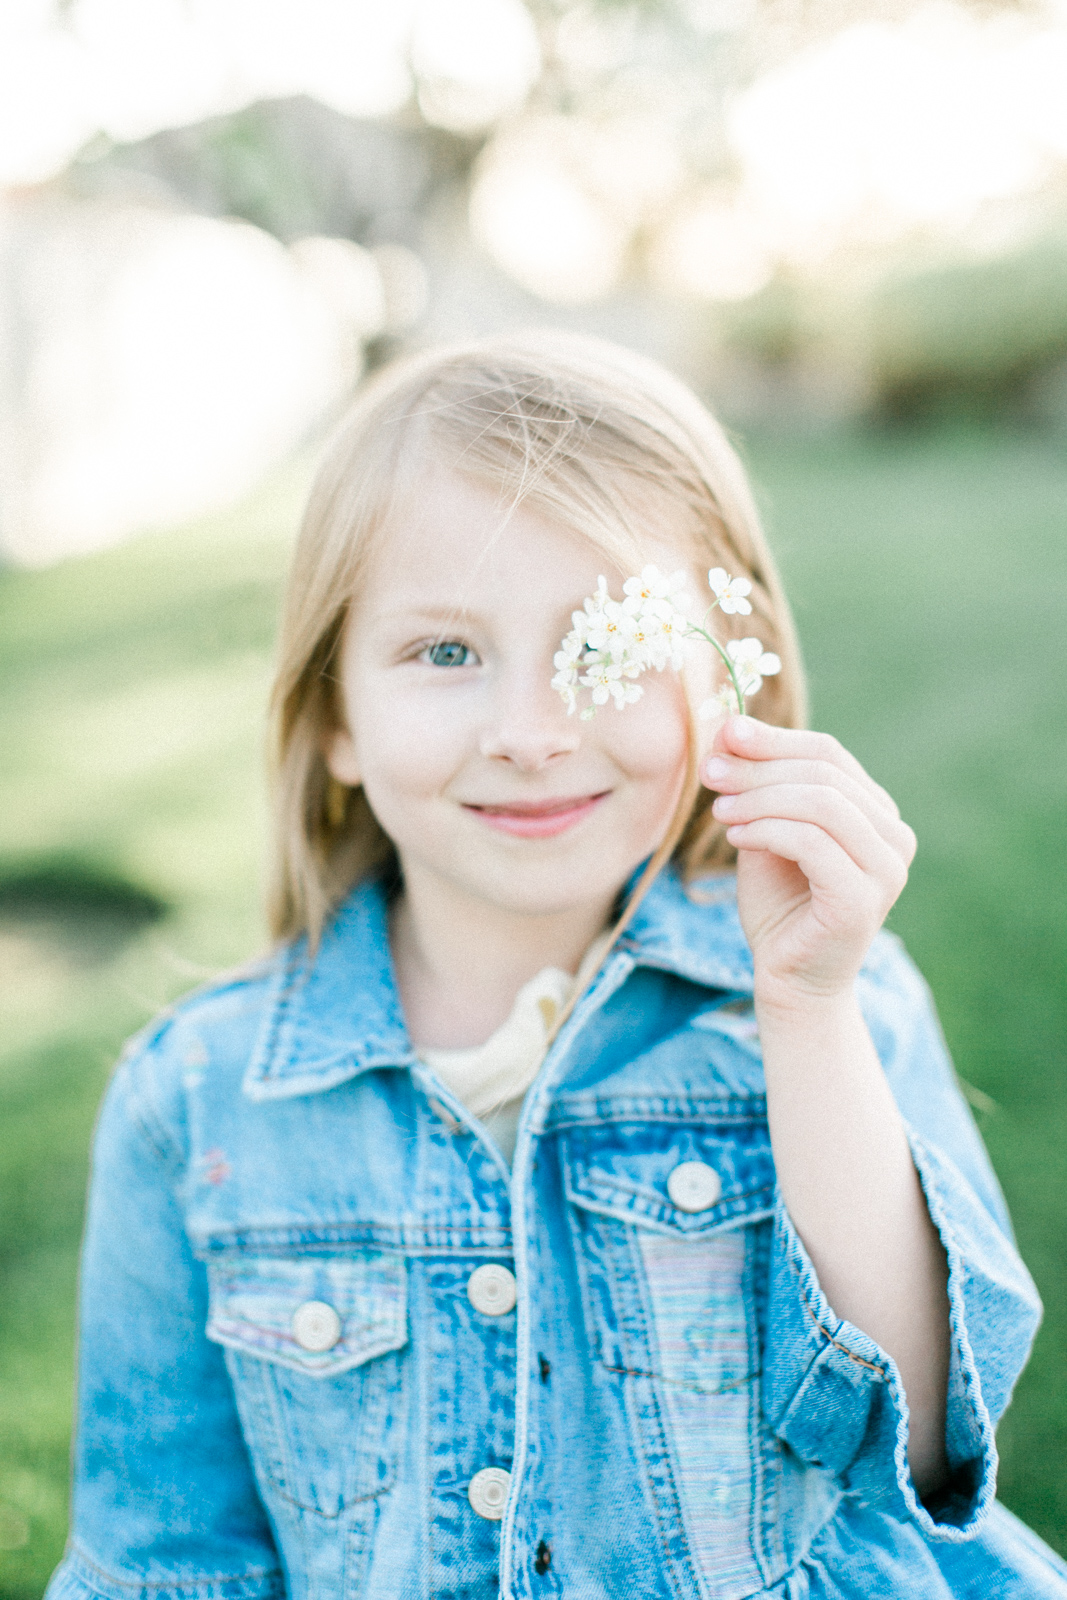
Best! Pretty skin tones and totally balanced.

Okay – a little warm.
With split toning, there’s no exact I can give you for what hue and saturation will look good. I keep mine roughly around what they are in this screenshot, but every situation is different and will call for slightly different values.
A word of caution – don’t obsess over this. When I started using split toning I felt like I needed to use it all the time, but you really don’t. It’s a fix for certain situations, and isn’t something that will necessarily make all of your images better. And keep in mind how subtle the differences are in the examples above – this shouldn’t be very obvious, even when you’re the one working on it!


+ Comments