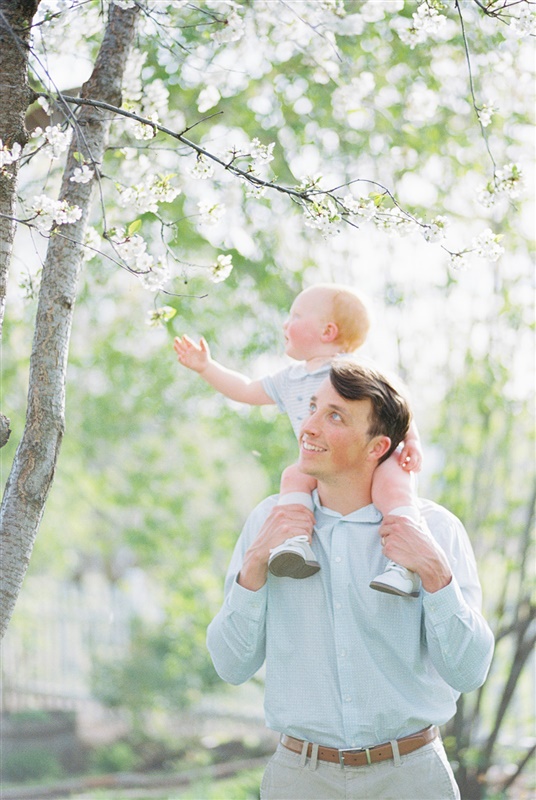
I love light filled photos. I love bright. Happy. Pastels and sunshine. “Dark and moody” was not a style I ever even considered, at all – it just doesn’t call to me, even though I really appreciate it when it’s done well.
I love light filled photos. I love bright. Happy. Pastels and sunshine. “Dark and moody” was not a style I ever even considered, at all – it just doesn’t call to me, even though I really appreciate it when it’s done well.
I am NOT here to to pick on anyone’s images or to criticize in any way – I always aim to do the opposite! But I see so many photographers get stuck on this common mistake, and I’ve coached many students through learning to nail the light-filled look without jumping off the light and airy cliff. Editing is such a common pain point, and I am here to help!
Also, I have absolutely been there too! There is a very particular stage I look back on in my own work where I got some new presets and tried to shift my style a bit, and everything ended up much too pink and much too bright and I cringe a little when I see how I edited back then. Ha!
So if you’re feeling less than enthusiastic about how you’re editing your images, but you love light and bright just like I do, I have some fantastic tips below to help you achieve exactly the look you’re going for, while maintaining a timeless aesthetic. These tips are especially important if you’re not shooting film and matching scans, since matching scans is a built-in way to keep yourself reined in while editing. Here goes! 🙂

1. Don’t take out all the shadows.
This is probably the MOST common mistake I see photographers making, and I have absolutely done this myself. But the truth is that light and airy images still very much need depth and contrast, and bringing up shadows too much ruins all of that. Images without good depth in shadows look flat and washed out.
What I suggest instead is to first bring up the blacks. As you’ll notice after studying film images for a while, there are plenty of shadows in film photos, but the blacks are gentle and not so stark. I personally am able to match my scans well and achieve a soft edit that still retains the depth it needs by bringing up my black values and trying to touch the shadows as little as possible. Depending on the lighting situation, you may still need to bring up shadows as well (usually in light with lots of contrast). But this editing switch really changed the game for me and made me so much happier with my edits!
*Note: this tip is especially important for those with dark hair and darker skin tones. Pulling up the shadows too much can make dark hair/skin look washed out, rather than rich and beautiful. It’s SO important to flatter every subject’s skin tones and hair color, every time!
2. Don’t blow the highlights.
Instead of bringing up my exposure on my photo too much, I actually like to bring up my white values a little bit. Again, if you study film scans, you’ll see that the highlights retain so much detail and they are not actually all that bright, even when the overall image feels quite bright. I get the best results by increasing my whites a bit, and often bring down my highlights as well.

3. Location, clothing, and type of light are just as important as your edit.
I’m not exaggerating when I say that the location you use, the clothing your subjects wear, and the quality of light you are shooting in are absolutely just as important as anything else when it comes to creating a light filled photo. Dark colors, deep shade, shooting just after sunset or in a darker home, etc. will never give you the same results as light colors, open shade or filtered backlight, or a brightly lit white home.
Now, I’m not saying that all of your photos need to have neutral/bright everything in them, and I personally have really come to love and embrace contrasty window light and the right amount of black in my clients’ wardrobe. I wore a black dress in some of my own favorite family photos a couple years ago! However, it’s really important to note that what you’re photographing, your available light, and your location all impact the final photo enormously. So whether you offer a client wardrobe to help achieve the look you love, or simply embrace your clients’ personal style and just let it go when they don’t wear something that you totally love, either is great!
4. Use a reference image.
One of the MOST important parts of editing a session consistently and ensuring that your edits are on track is using a reference image while you edit. In Lightroom, all you have to do is:
- navigate to the image you want to use as your reference
- hit Shift-R to bring up the reference view
- drag your chosen image into the reference area on the left side
- make sure the icon below shows that it’s locked (if your reference image is in a different folder than the session you’re editing)
This way, you can have that image to guide you as you edit and keep you consistent. For me personally, my reference image is typically a scan that I am trying to match from the same session. But if you’re not shooting film, a reference image is just as important! I recommend having a little collection of reference images that represent different lighting scenarios that you shoot in – for example, an indoor session, outdoor session on a sunny day, and outdoor session on a cloudy day. These can be photos that you’ve taken and love the edits on, or they can be images from another photographer whose style you love. Either way, you will be able to make sure that your brightness level stays under control and that you don’t accidentally wash all the depth from your images.
A couple quick notes:
I use The Archetype Process for my digital edits. These profiles get really mixed feedback depending on who you talk to, but I personally love them! My tips are still relevant no matter what presets or profiles you’re using to edit, but the process may look different for you. For example, many presets add lots of contrast and adjust the white/black/highlight/shadow values for you. In this case, just remember that the point of tips 1 & 2 is to make sure that you’re not brightening shadows too much or blowing out highlights, and then you can figure out how to apply that using whatever editing methods you’re enjoying.
I love so many styles of photography and in no way am I advocating that everyone should be emulating film – I actually do not believe that in the slightest! But most photographers who seek out a mentorship with me have a very similar style to mine, and I really do love creating images with a timeless look, which for me means shooting & emulating film. These tips will definitely help you achieve that look and emulate film better, if that’s what you’re going for. And no matter your style, it’s still important to keep depth and contrast and not blow out highlights!
Interested in a one-on-one editing deep-dive? I LOVE helping photographers nail their editing! In an editing mentorship, I teach photographers step-by-step how to get exactly the look they’re going for and how to overcome their editing challenges, using their own photos and their own presets. I also include my favorite secrets for the best ever skin tones! Find out more here. 🙂
Happy editing, friends!
My name is Hannah Mann. I am a photographer and educator based in Boise, Idaho, and I specialize in helping family photographers take beautiful photos and build profitable businesses. If you are interested growing as a photographer and business owner, check out my mentorship and coaching offerings, and feel free to read a little about me to learn about why I believe so strongly in what I do.


+ Comments